The most searched query on Google is How to Migrate PST to MS Live Exchange Server?
Are you facing any difficulties with the same process?
Do not be concerned if the response is ‘Yes‘. In this informative article, we will discuss all of the many configurations that are available for adding PST files to Exchange Online.
Benefits of Migrating PST to Microsoft Live Exchange Server:
- Enhanced accessibility: Exchange Server ensures that your emails are accessible from any internet-connected device. There is no longer a need for PST files that can be moved.
- Collaborating for improved results: Exchange Server streamlines collaboration. Team members can effortlessly exchange emails, calendars, and contacts.
- Exchange Server makes it easy for managers to do their jobs by putting user accounts, emails, and rights in one place. There is effective control from one place.
- Safety: Exchange Server keeps your important emails safe by not letting people in who don’t belong there.
- More space for storage: Exchange Servers can store a lot more information than PST files can.
Learn More About PST files:
You may save your Outlook emails, contacts, objectives, tasks, and notes as PST files. There are certain limits when dealing with PST files offline, but they are workable. You can browse and generate backups of your data.
- Based on the version of Outlook being used, a PST file can only be a certain size. A lot of texts have gone over this max size.
- First, open the PST file on the computer where it was saved. Then open Outlook.
- Issues with Backing Up: Backing up every PST file by hand can take a long time and lead to mistakes.
Get Ready to Migrate:
It is very important to make a different list of thoughts before you start. This list should include the following:
- List of PST Files: Putting together a complete list of all the PST files and the people who are the owners of each one is a good idea.
- Check the mailbox size.: Please make sure that the mailbox is the right size. An important part of the process is figuring out how much space your mailbox needs to hold its items.
- Contacting Users: Let people know about the move and any downtime that might happen.
Selecting the Best Method for Migration:
There are two main ways to go about it:
- Manual Method to Import (Limited Use): Exchange Management Console (EMC) or Exchange Admin Centre (EAC) can migrate PST data to an Exchange server folder.
Important:
This is a simplified summary. Official Microsoft documentation provides directions and limitations:
You can learn how to import PST files to Office 365 at:
https://learn.microsoft.com/en-us/purview/importing-pst-files-to-office-365
- Automatic Software: It’s very helpful to have Automatic software because it lets you sort, plan, and keep track of progress. This tool is great for moves that are hard to do or involve a lot of data.
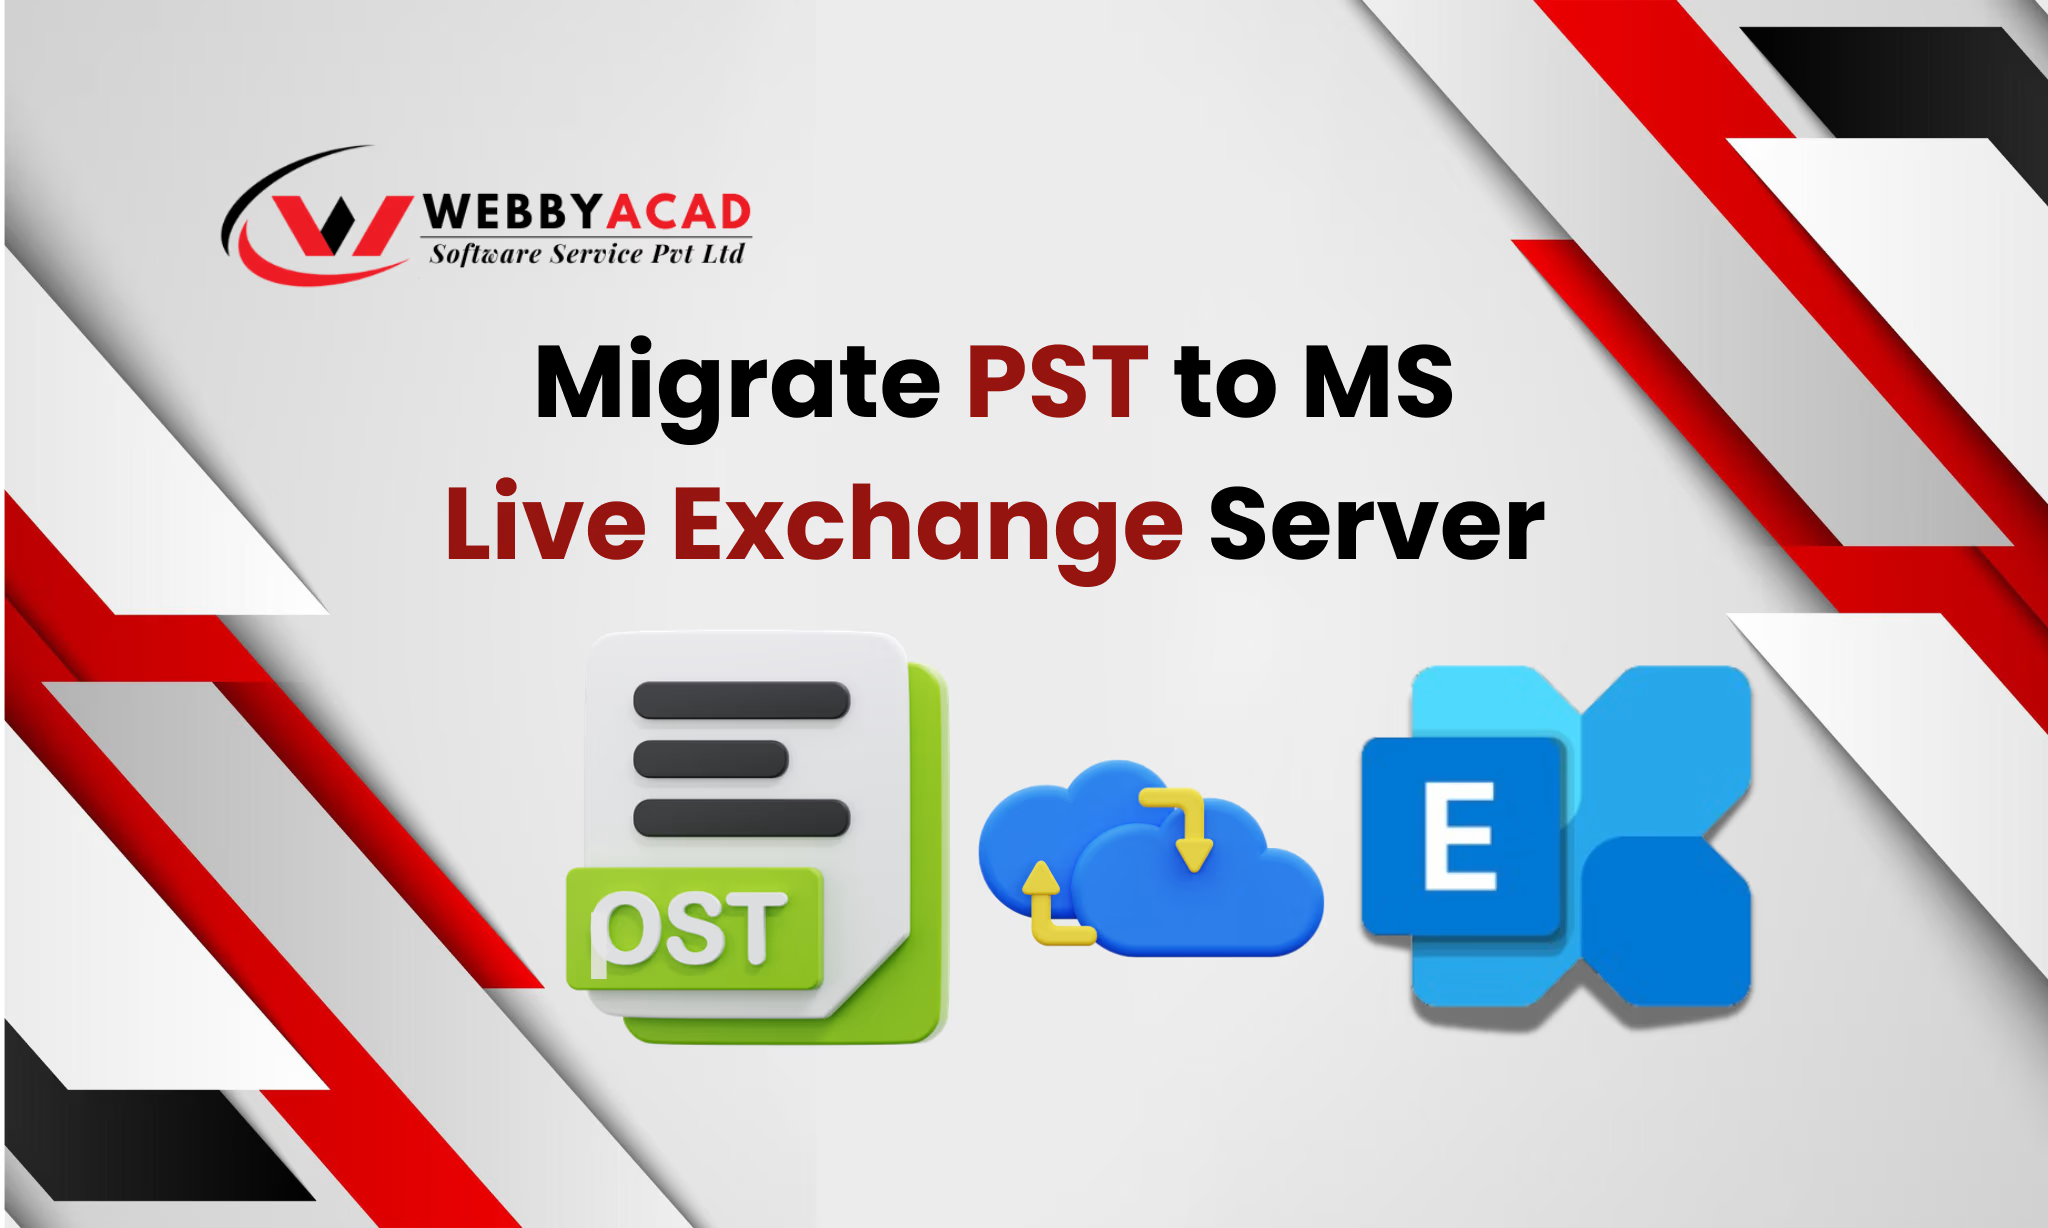
Migrate PST to MS Live Exchange Server(Step-by-Step Guide):
1. Install and Run the software: Download, and install the WebbyAcad PST converter tool on your computer. After that, Run the software and familiarize yourself with the interface.

PST Converter Tool
The ultimate solution for seamless pst files to zoho & Cloud migration. Convert your data with 100% accuracy.
- Instant Cloud Migration
- Supports Office 365
- Google Workspace Ready
- 100% Secure & Reliable
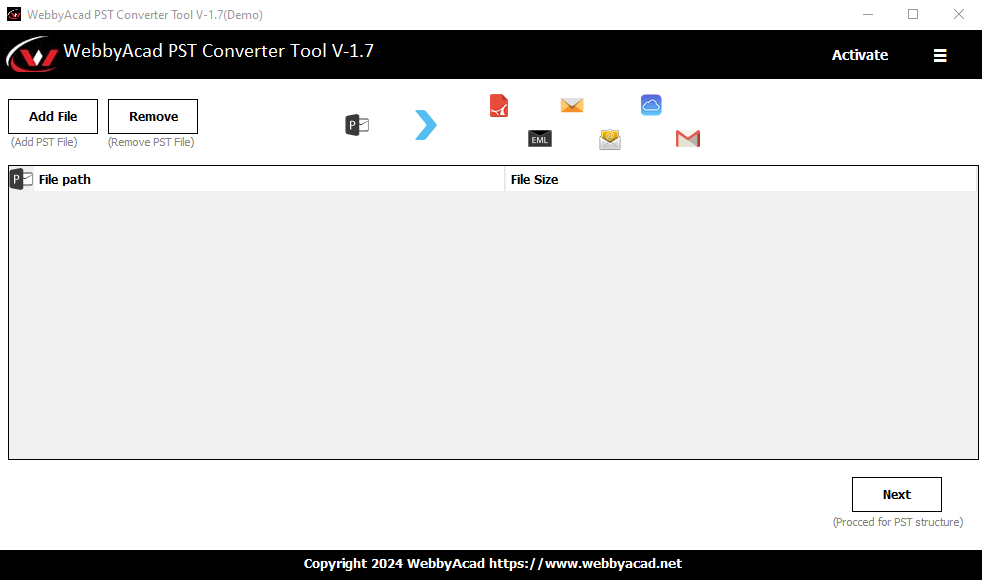
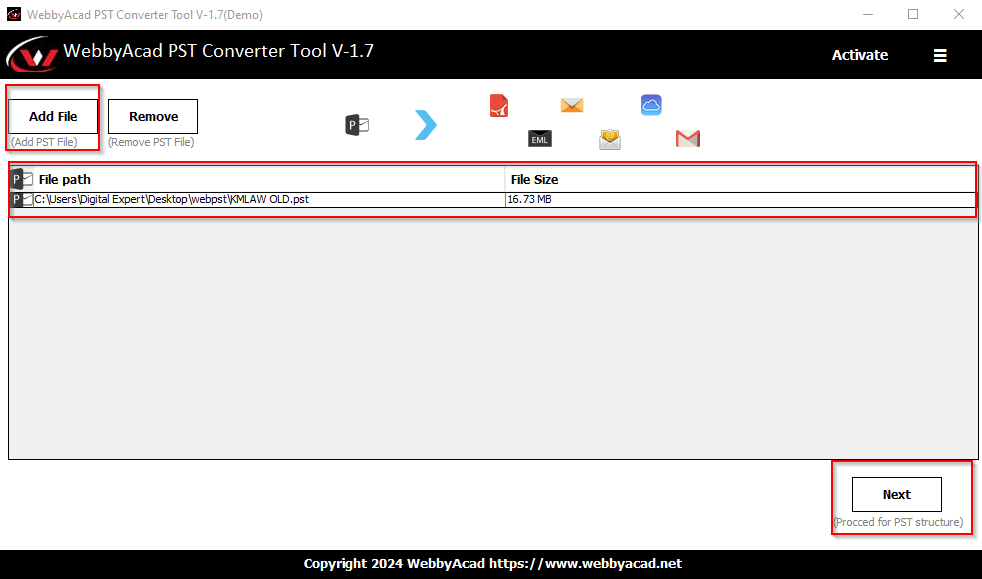
2. Add Files: Just click “Add Files” and pick out the PST files you want to move. You can select either a single PST file or a folder with many PSTs inside it.
3. Folder Mapping and Filtering (Optional): This step maps PST directories to Exchange Server mailbox folders. Use the filtering options to pick emails by date, sender/recipient, or keyword.
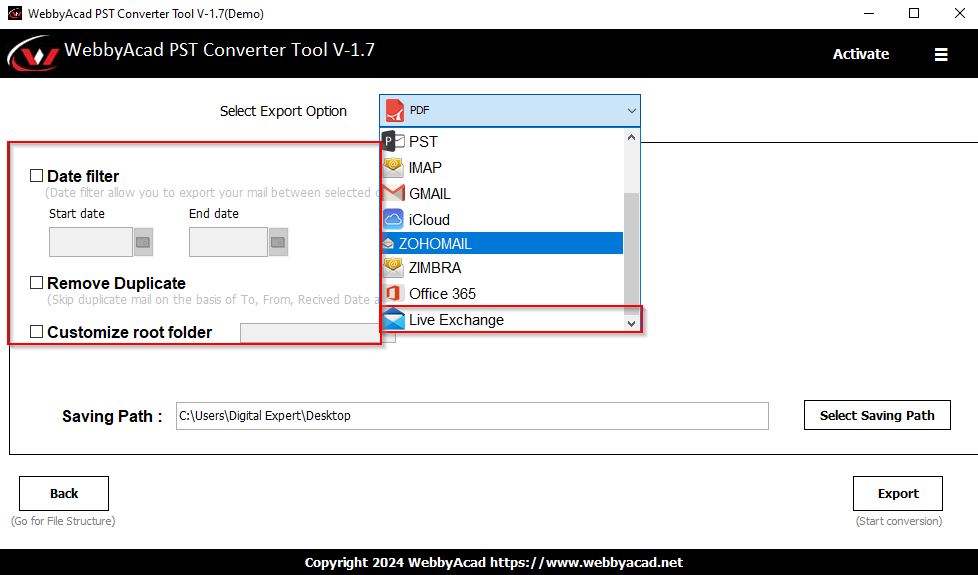
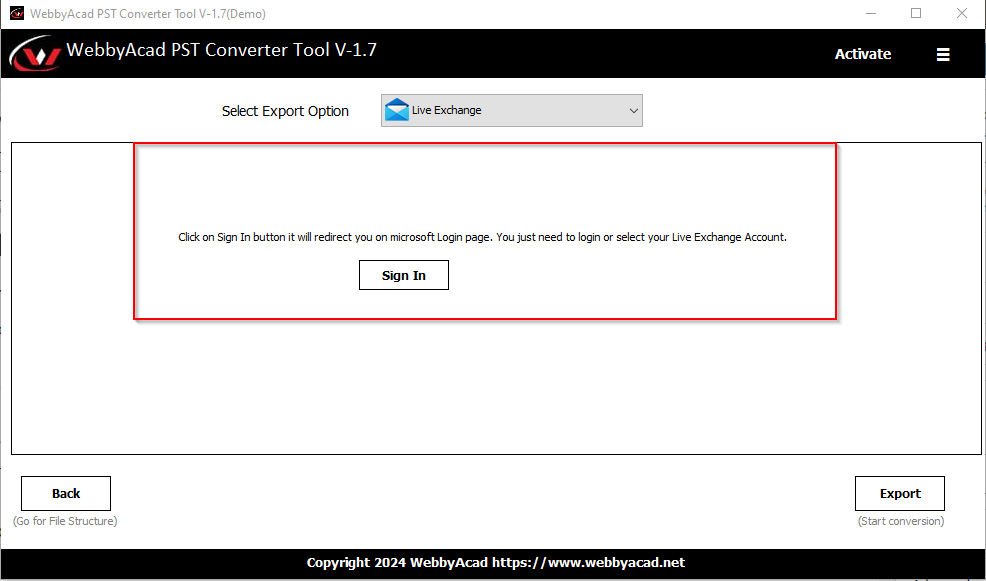
4. Select Target Exchange Server: Use the server name or IP address to locate your Live Exchange Server. Provide your Exchange Server “username” and “password” to prove your identity.
5. Initiate Migration: Click the “Start Migration” button once you’re done reviewing and setting up your choices. The tool will start moving your emails from the PST files to your mailbox on Exchange Server.
6. Monitor Progress and View Reports: A progress bar will show how far along the move is. After it’s done, the tool will also give you a full report that you can read to figure out what went wrong.
Now, Here Are Some More Help for a Smooth Move:
- Make a copy of your PST files: Make sure you have a good copy of your PST files before you start moving.
- Get your Exchange server’s space back: Make sure there is enough room on your Exchange Server for the emails you moved.
- Move a Few Emails First: If you have a big PST file, you don’t have to, but you might want to move a few emails first to make sure everything works.
Take Control of Your Emails:
Migrate PST files to Live Exchange server with ease by following the step-by-step instructions and using the additional recommendations. You can simplify your email and better manage your contact details.
Conclusion:
In this article, we have discussed all the methods to migrate PST to MS Live Exchange server. The manual method of conversion is suitable only for a small batch of MBOX files. Experts don’t recommend to use for large MBOX files. MVPs recommend using software specially designed for this kind of task to migrate large batches of MBOX files.
In today’s fast-paced digital environment, email management is crucial to remain organized and productive. So choose the process of migration according to the situation.