
In case you are an off-line Outlook user, who wants to Import Outlook OST File to iCloud (Apple Mail) account, you are welcome. In this guide, you will get detailed help on how to go about the process and get a good solution for your migration process. We will introduce you to a utility that can assist you in importing Outlook OST files to iCloud in a convenient way at the end of this blog.
Using the OST file changer wizard, you can easily import multiple OST files at once and make the transfer of emails to iCloud smooth and effective. Continue following this blog to learn how this tool can help you and enable you to migrate email without much stress. Well, it is time to immerse and understand what would be the most effective method to transfer OST files to iCloud.
Realizing the Importance Importing OST File to iCloud
OST and PST are the two formats that Outlook accounts use to archive mailboxes, allowing them to access it offline. These options can be chosen by the users for both personal and professional use. However, for diverse reasons, users migrate from offline OST files to PST and Apple Mail accounts. In the subsequent discussion section, one will explain the reasons for moving from Outlook OST to Apple Mail as follows.
- Access Anywhere: Having your Outlook information stored in the cloud means that you can use your Contacts, Calendar, and Emails on any device, including iPhone, iPad, Mac, and Windows PC.
- Device Synchronization: Anytime access of updated information through synching permits the user to access the latest Outlook data irrespective of the used device.
- Robust Security: It is critical to note that iCloud offers considerable security mechanisms to safeguard your data as well as guarantee authentic ownership of OST files.
- Enhanced Collaboration: Outlook has made the sharing of calendar, contacts and emails from Outlook account convenient, enhancing the way the members of a team work.
In this guide, we will explore two approaches: the Reliable method which helps directly to Import Outlook OST File to iCloud and the manual method. Here you will also find outlined steps for each method to ensure that the importing process which is effective as possible.
Solution 1: Manually Import OST to Apple Mail
The process of importing OST to Apple Mail has three stages.
- Export OST to PST
- Open the PST file and save it in MBOX file format
- Import MBOX into Apple Mail.
We shall now discuss steps by steps procedure so that you gain adequate knowledge for Import OST File in Apple Mail.
Step 1. Save Outlook data file as PST file
To export your OST files to PST, follow the below steps:
- First, Open the Microsoft outlook on your device.
- First, go to the “File” menu and click the “Open and Export” button, then move down to “Import/Export”.
- Select the “Import/Export” option then select the “Export to a file” option before clicking the next button.
- Select the file type “Outlook Data File (. pst)” and go to the next window.
- Choose the folder that you want the export in outlook.
- Then, specify the Name and destination of the exported file and click “Finish”.
Step 2. Migrate PST into MBOX file
- Launch MS Outlook, and then drag and drop the PST file and import it.
- Next, type Thunderbird/Start, then find Tools and click on Import options.
- Next select Mail and then click on the Next option.
- Next, select Outlook from the provided options and proceed to the next step.
- Under the Local Folders there is an Outlook Import folder which contains all the emails.
- Next close the Import window.
- Next type ‘Thunderbird’ in the search bar of the browser and open it and then we will proceed to install the ImportExportTools NG extension.
- Select Tools → import/export tools → export all the folders.
- Last but not the lease, you obtain the MBOX file that includes all the PST mailboxes.
Shown below are the steps on how to save the file and set the destination where it should be saved:
Step 3. Use MBOX to Apple Mail
- First, to proceed with the tasks, one needs to go to the File of the Apple Mail.
- Then, choose Import Mailboxes.
- Now choose the “Files in . mbox format” option and click continue.
- After that, navigate and choose the MBOX file and the import process will begin.
- After the MBOX file is successfully imported into Apple Mail, the user is then capable of importing the OST file into the Apple Mail application. Using this manual method one can easily use to Import OST files to iCloud but it does have some drawbacks.
Some drawbacks of the above method
- Users willing to save a few OST files to iCloud account can follow the manual process correctly. Large quantities of data sent from OST to iCloud might pose a problem in the process.
- This method is feasible if one has adequate technical power to execute this method correctly.
- The main disadvantage of this process is that it does not support bulk conversion of OST files to iCloud.
- Incorrect input values will result in corrupt and damage your data during the conversion process.
- There are instances that adding an OST file to an iCloud account takes a lot of time.
- You have to use direct method if the manual method is creating confusion to you in moving the bulk data from OST file to iCloud account then you have to take backup of Outlook OST files and folders simultaneously with the help of iCloud accounts.
Solution 2: How to Directly Import Outlook OST File to iCloud Account
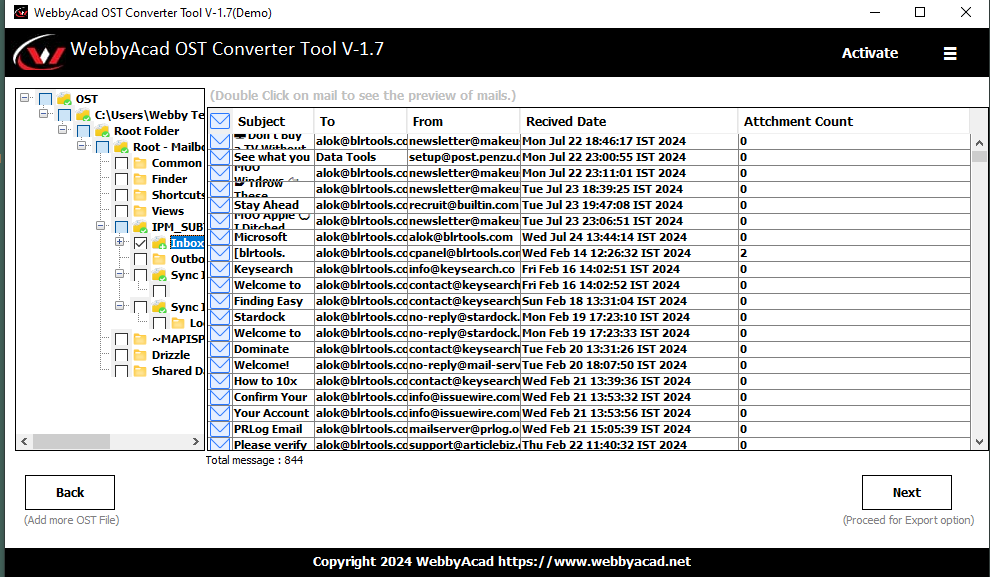
Webbyacad OST email converter is a useful software to convert the OST file directly in bulk into the desired iCloud account. In terms of usability, interface, and accessibility. The tool is simple to use even though it has numerous features and a large number of activities. It also enables the conversion of OST emails to PDF, PST, MBOX, and other file formats. It is also important to note that the use of this software does not require the user to be tech-savvy.

So, let’s follow the guide below to learn how to Import Outlook OST Files to an iCloud account in a batch.
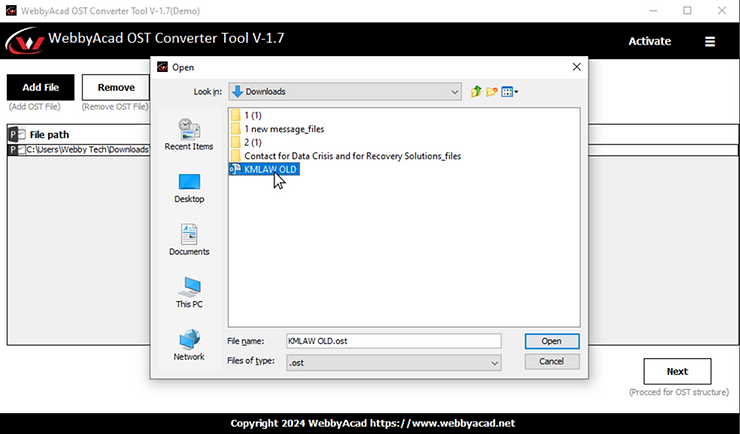
- First, one needs to download and install the Webbyacad OST converter software.
- To do this, click on the ‘Select Files’ button or the ‘Select Folder’ button to choose the relevant OST files for the operation.
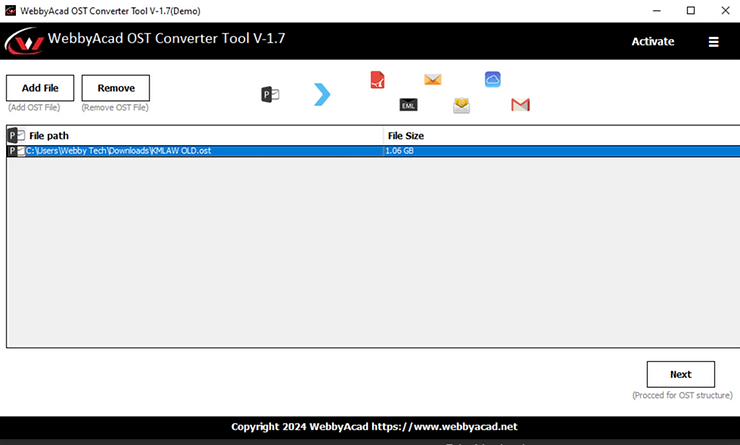
- Choose the files you want to view in the list on the tree structure, and then click ‘Next’.
- Preview Emails: Select the folder to migrate and preview it before the conversion process.
- Click on the drop-down menu and then choose ‘iCloud’ for importing to iCloud.

- Before accessing, further it is require to have username, password, host and port name, followed by clicking the ‘Sign-In’ button.
- After filling all details, finally, click the “Convert/Export” button to start adding the OST file to iCloud account.
- The file has been converted into an iCloud account and the conversion process has to be done.
- For a free version, the OST email exporter will back up only 15+ emails per folder. If you want to convert more files then you have to buy a license version.
Conclusion:
Here in this post, we have discussed step-by-step guidance to convert OST files to Apple Mail. Although importing OST files into Apple Mail seems difficult this could be easily done with the best OST email migrator. We have already explained a way to do it manually, but this does not import OST directly into Apple Mail. Some of the problems related to manual method could lead you towards loss or damage data. You can choose any of the methods we have mentioned in this blog but importing directly into Apple Mail using OST Email Converter is recommended.


1 thought on “How to Import Outlook OST File to iCloud Mail Account”
Comments are closed.