When you move PST files to Office 365, you can view all of your emails, contacts, and calendar events from anywhere. Users can also use Office 365’s advanced features for protection and working together. It’s easier to handle and keep your info safe when it’s all in one place. Since each user’s wants are different, there may be other reasons why they have to switch to Office 365.
There are a few quick and easy ways to migrate Outlook PST files to Microsoft 365 without changing the way the mail groups and things are organized.
Different Ways to Migrate Outlook PST Files to Office 365
Moving Outlook PST files to Microsoft 365 can be done in four different ways. You can choose any of the following ways, depending on how many Outlook PST files you need to upload or move to Microsoft 365:
- Import Outlook PST via Outlook Import Export Wizard
- Network Upload using AzureAZCopy Tool
- Ship the Drive Containing PST Files to Microsoft
- Use WebbyAcad PST to Office 365 Converter Tool
Method 1: Import Outlook PST via Outlook Import Export Wizard
If you want to use the Import/Export process to bring Outlook PST files into Office 365, do the following:
- You need to either sign in or add your Microsoft 365 email account in order to use the Outlook app.
- Add the account under File > Open & Export. Simply click Bring in or Send Out.
- To import data from another application or file, click “Import” and “Next.”
- Choose.pst when requested, then click Next.
- Click Browse and Next to choose the PST.
- Click Finish after selecting Microsoft 365.
- You may check Microsoft 365 email thereafter.
Pros:
- Easy to use for individuals.
- No other software needed.
Cons:
- Very time-consuming for huge PST files or many users.
- Limited import restriction.
- Mailbox size limits vary per Office 365 subscription.
Method 2: Using the AzureAZCopy Tool to Upload to Network
You need to add the Import Export and Mail Recipients roles to the user account you want to use to send the Outlook PST to Office 365 before you can use them. You also need the AzureAZCopy tool.
Important: For full directions on how to use AzCopy, see Microsoft’s official guidelines.
https://learn.microsoft.com/en-us/azure/storage/common/storage-ref-azcopy
Method 3: Send Microsoft the Drive with the PST Files on it.
You can also ship Microsoft your Outlook PST files and ask them to add them to your Azure Storage. From the Command Prompt, you can run the Azure Import/Export tool. You can use this tool to move the PST files, make a log file (abc.jrn), and lock the hard drive with BitLocker.
PST files cost $2 per GB or $2,000 per TB. Time for a crucial task. After uploading PSTs, pick Ship hard drives to one of our locations. All the instructions are in this Microsoft paper.
Don’t add PST files larger than 20 GB to your hard disc. If so, imports might slow down.
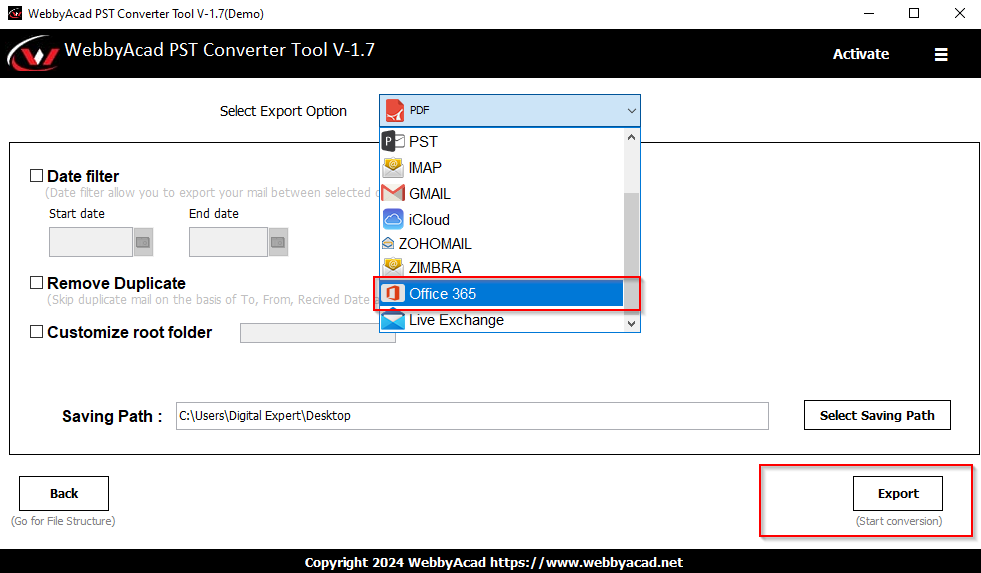
Method 4: Use Outlook PST to Office 365 Migration Tool
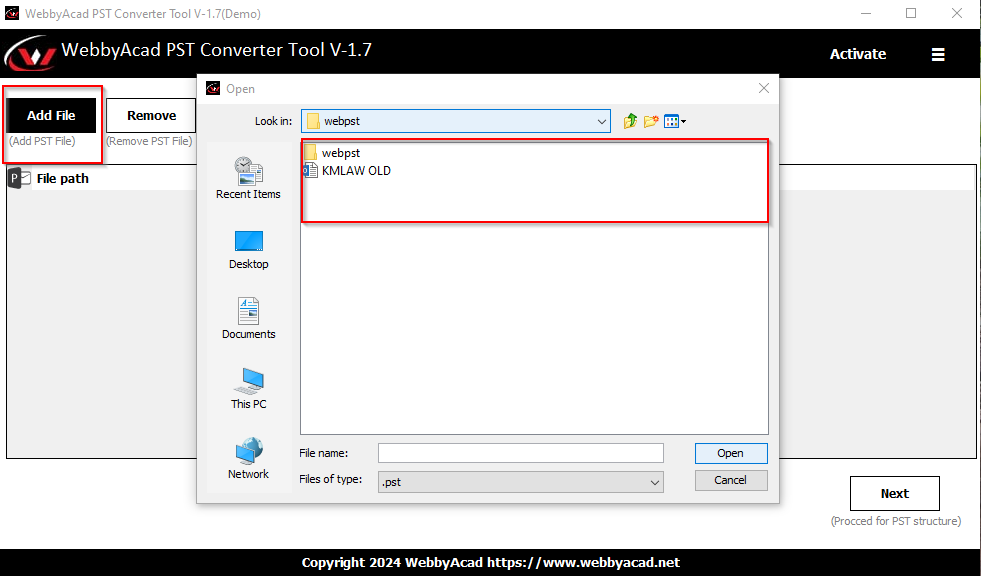
Download and Install: Download and install WebbyAcad PST Converter Tool.
- Drop and Add PST File: You can drop and “Add” PST files into the software. No need for a difficult setting.
- Choose Where to Put Your Location: Choose your Office 365 mailbox as the place where the files will be moved.
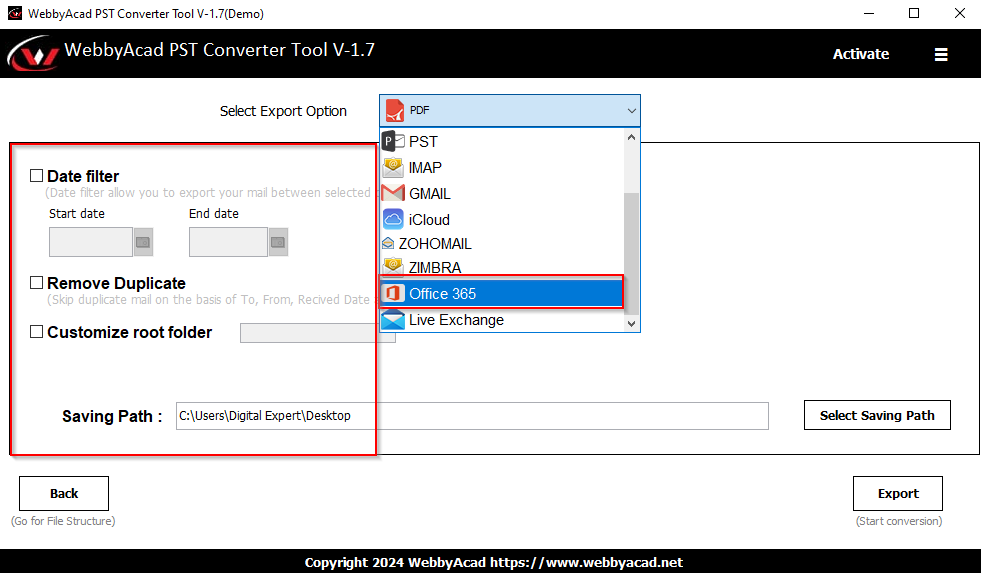
- Start Transfer: Click “Export” to start the transfer. WebbyAcad will take care of the rest. Take it easy and enjoy the smooth change!
Trust Yourself to Use the Cloud
This guide gives you the information you need to move your PST files, no matter which way you choose. WebbyAcad PST Converter is an easy-to-use and effective option to the ways Microsoft provides. Get a WebbyAcad PST Converter right now to make the switch to the future of communication in Office 365 as easy as possible.